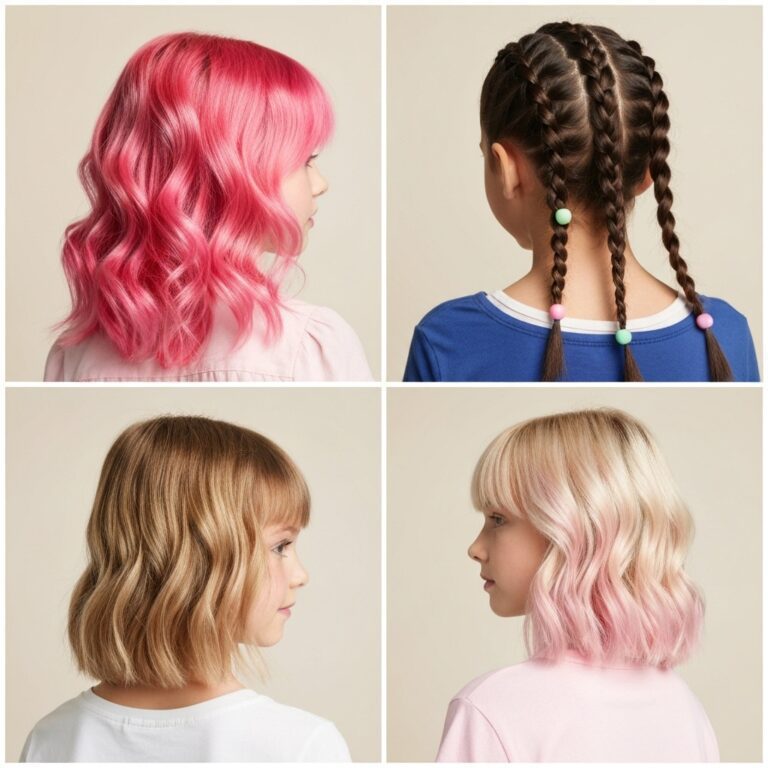
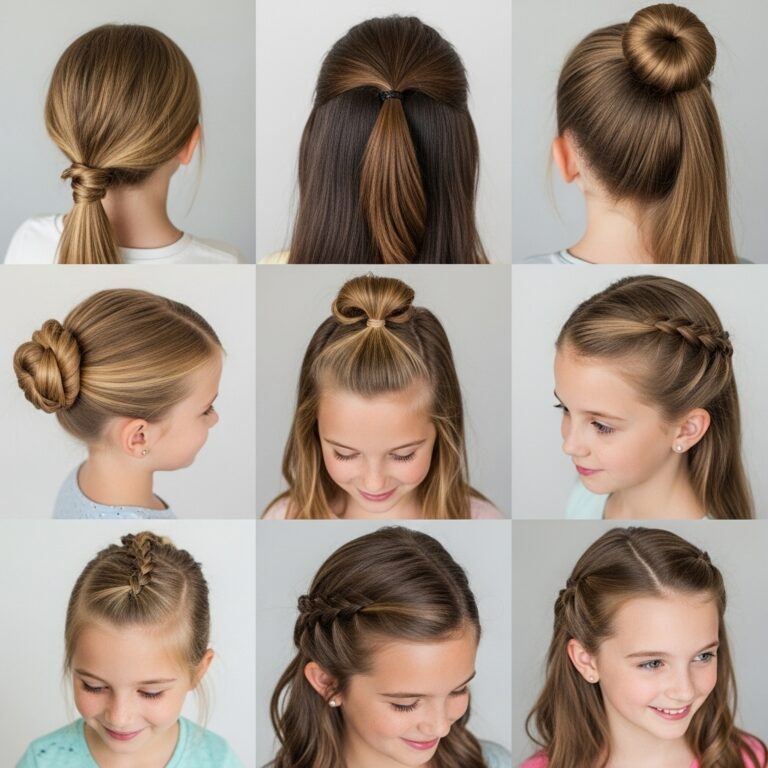
Back-to-School Hairstyles with Braids (Easy + Quick)
Ready for school mornings that don’t feel like a speed run? Same. I love braids because they look polished, hold through recess, and don’t demand a 5 a.m. wake-up. You want easy, quick, and cute—in that order. I’ve tested these on busy mornings, post-PE chaos, and humid days. Want styles that survive backpacks and hoodie drama? Let’s braid smarter.
Why braids win the school morning
You need styles that lock in, reduce frizz, and keep hair out of eyes. Braids do all that and still look intentional. Ever noticed how one clean part line instantly makes a hairstyle look “done”? That’s the braid effect. You get control, texture, and longevity without heat. What’s not to like?
The 60-second setup: prep that saves your sanity
I keep a tiny “braid tray” near the mirror. It saves me every time. FYI, the right prep trims styling time in half.
What I grab first:
- Detangling spray or a light leave-in conditioner for slip.
- Mixed bristle brush + rat-tail comb for clean parting.
- Micro elastics (clear or hair-colored) and soft scrunchies.
- Edge brush and light gel or styling cream for flyaways.
- Dry shampoo for day-two hair; hair oil for dry ends.
- Clips to section and hold.
Quick prep flow (60 seconds):
- Mist lengths with detangler; brush from ends up.
- Apply a pea-size cream through mids to tame frizz.
- Set a part with the rat-tail comb; clip one side so it stays put.
- Keep elastics on your wrist so you don’t go hunting mid-braid.
Pro tip: Smooth the hairline with a toothbrush-style edge brush. It instantly elevates any braid.
The 5-minute braid menu (zero stress)
When the bus clock mocks you, reach for these. They hold, they flatter, and they’re fast.
1) Bubble Braid Pony — Time: ~3 minutes
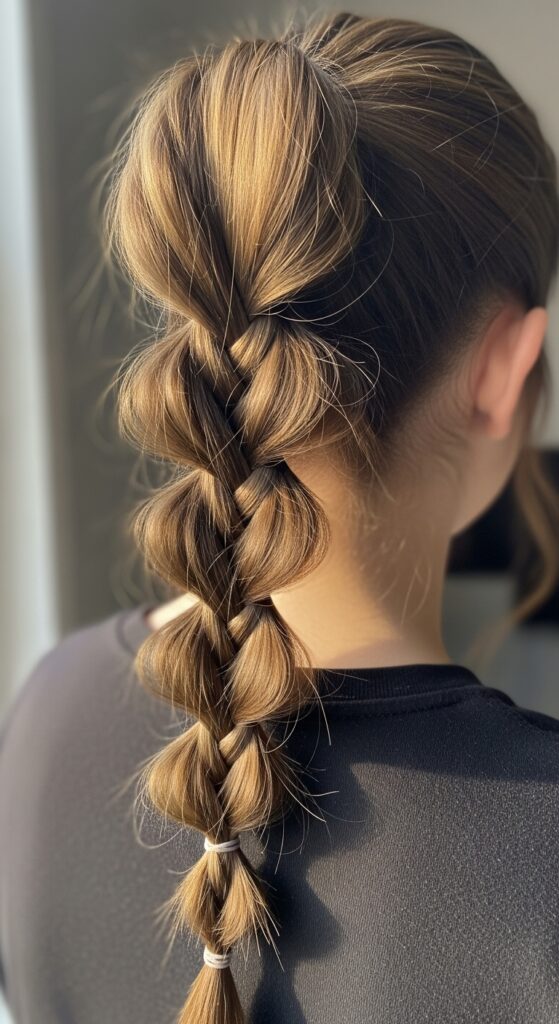
Best for: Medium to long hair; straight, wavy, or curly.
Why it works: It looks elaborate but skips weaving entirely.
Steps:
- Brush hair into a mid or high pony; secure with a scrunchie.
- Add a mini elastic every 2–3 inches down the pony.
- Gently tug each section to “bubble” it out for volume.
- Smooth flyaways with a touch of cream.
Make it yours: Thread a thin ribbon through the top elastic for team-color days.
2) Rope Braid Half-Up — Time: ~4 minutes
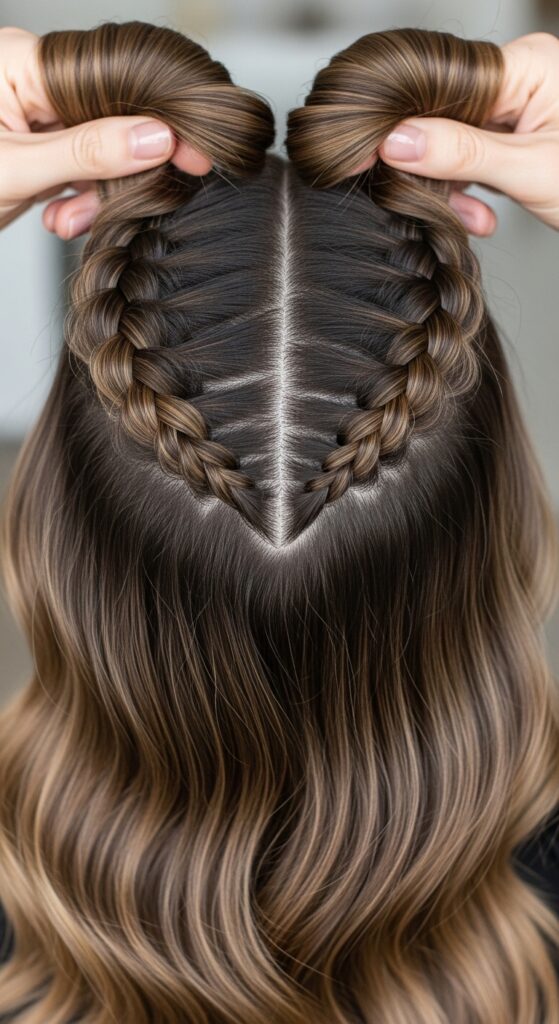
Best for: Fine hair that needs texture.
Why it works: Twists add grip and polish in seconds.
Steps:
- Take two small sections from temples; gather at the crown.
- Twist each section outward, then twist them together.
- Secure with a micro elastic; hide it with a tiny hair wrap.
Pro tip: Mist fingers with hairspray before twisting for a clean finish.
3) Headband Braid (No Accessory Needed) — Time: ~5 minutes
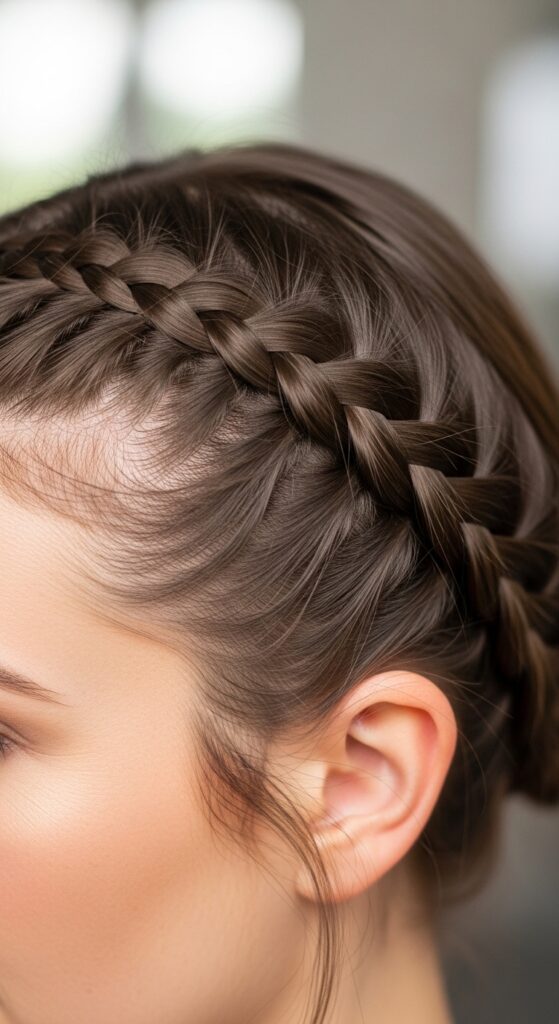
Best for: Growing-out bangs; classroom activities.
Why it works: It keeps hair off the face without a bulky band.
Steps:
- Create a deep side part.
- Pick up a small front section; Dutch-braid along the hairline to the ear.
- Secure behind the ear with bobby pins or a micro elastic.
- Fluff the braid slightly for softness.
Shortcut: Use a three-strand braid if Dutch feels extra at 7 a.m.
4) Dutch Pigtails Lite — Time: ~5 minutes
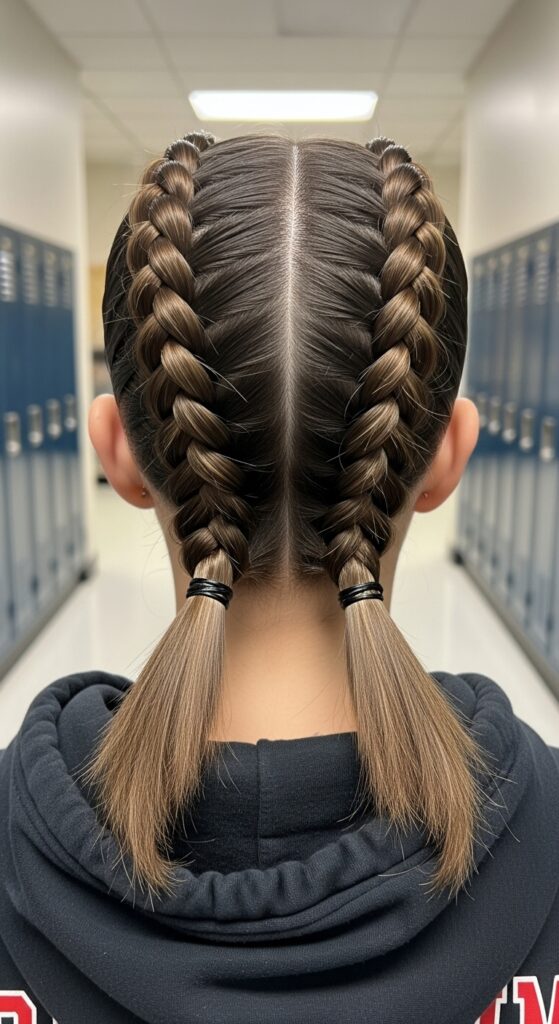
Best for: PE days; medium to long hair.
Why it works: You braid only halfway, then tie off.
Steps:
- Part down the middle; clip one side.
- Dutch-braid each side from hairline to just below the ear.
- Tie off and finish with low ponytails or mini buns.
Hack: Spray the part line with a touch of dry shampoo to keep it crisp.
The 10-minute level: styles that last all day
When you have a few extra minutes, these survive backpacks, gym, and after-school clubs.
5) Dutch-Braid Pony — Time: ~8–10 minutes
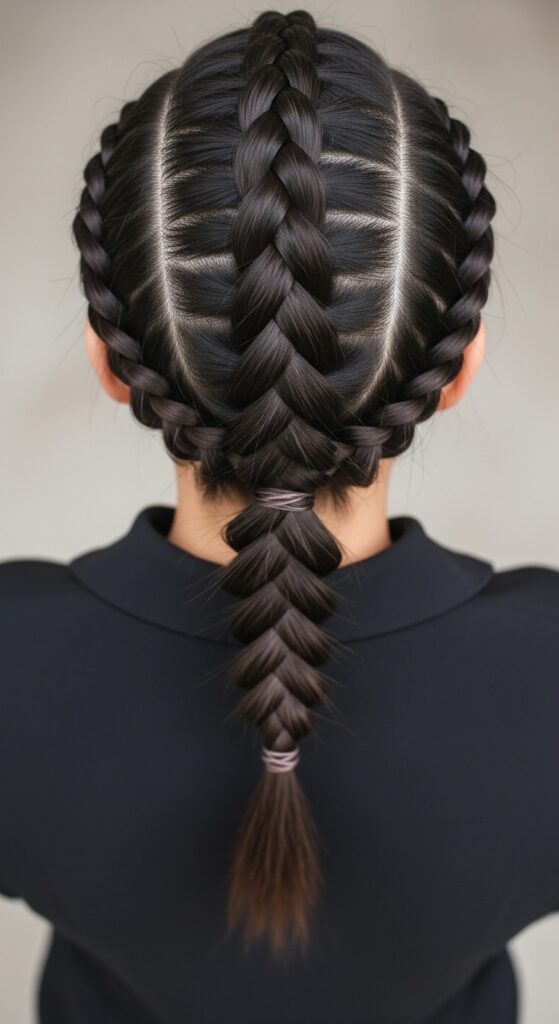
Why it works: The braid anchors the hairline; the pony keeps it playful.
Steps:
- Start a Dutch braid from the crown to the nape.
- Gather all hair into a mid pony; secure firmly.
- Wrap a small strand around the elastic for a clean finish.
Pro tip: Angle the braid slightly off-center for face framing.
6) Braided Top Knot — Time: ~9 minutes
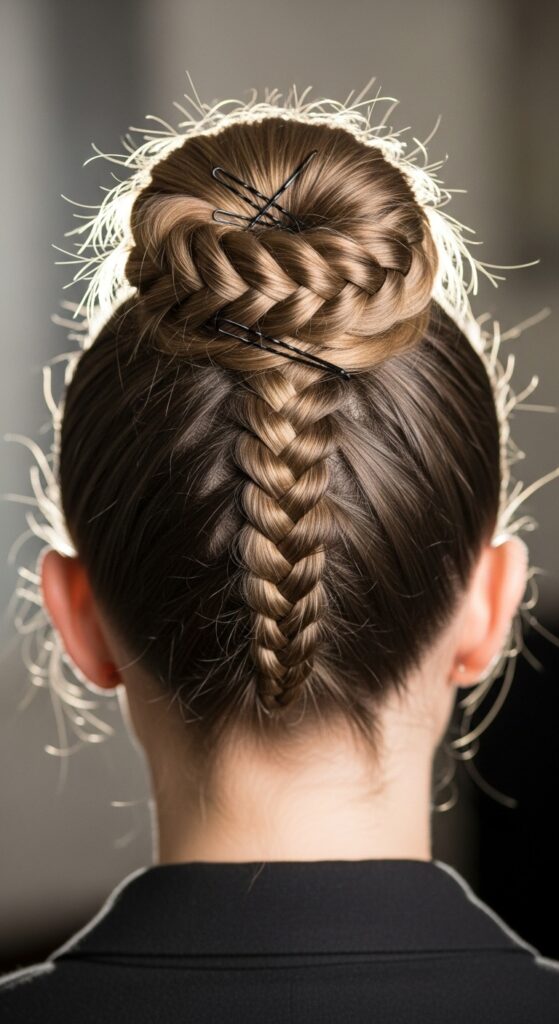
Why it works: It keeps hair off the neck and still looks trendy.
Steps:
- Flip the head; French-braid from nape to crown.
- Gather all hair into a high pony; twist into a bun.
- Pin around the base; tug gently for volume.
Make it sport-proof: Cross two bobby pins like an “X” into the base.
7) Fishtail Side Braid — Time: ~10 minutes
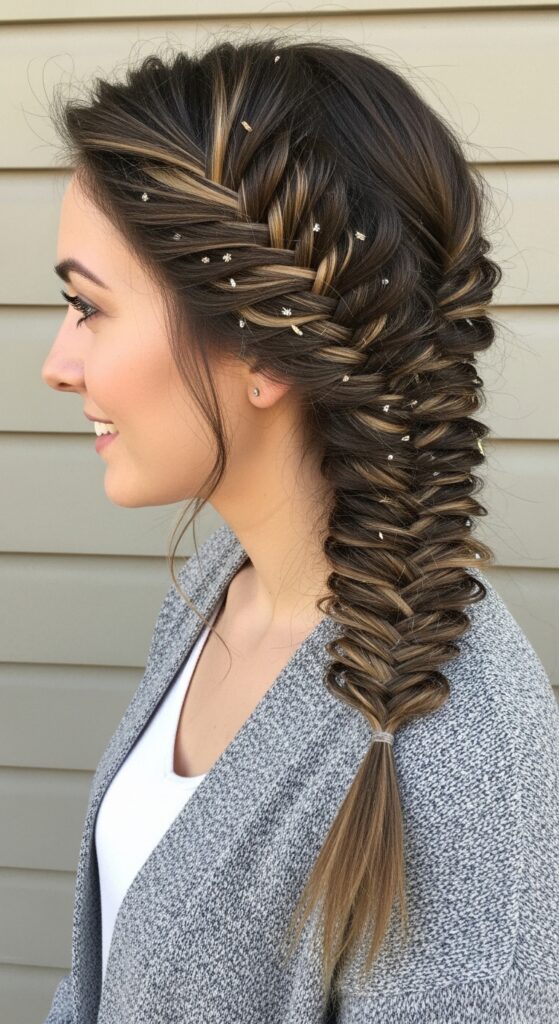
Why it works: It looks complex but repeats one simple move.
Steps:
- Sweep hair over one shoulder.
- Split into two sections; cross a small piece from the outer edge of one side to the other.
- Repeat down the length; tie off; pinch for texture.
Shortcut: Start with a low pony, fishtail, then cut the top elastic for softness.
8) Boxer Braids (Double Dutch) — Time: ~10 minutes
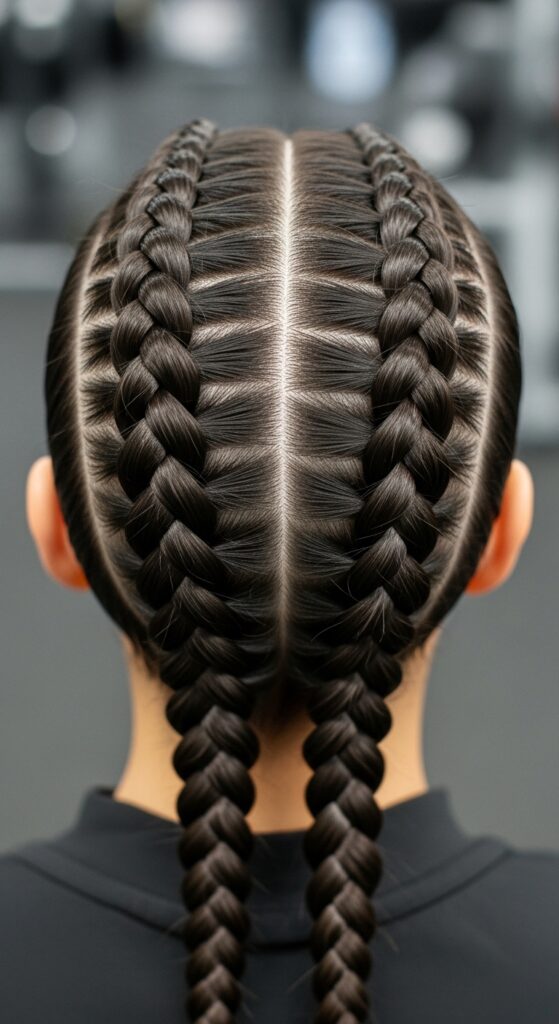
Why it works: It’s secure, symmetrical, and perfect for sports or windy days.
Steps:
- Center-part; clip one side.
- Dutch-braid each side tight to the head; finish with plaits.
- Gel the hairline lightly for a sleek result.
Tip for beginners: Keep elbows up to maintain tension as you add sections.
Protective and low-manipulation braids (curly & coily friendly)
You want hold with gentle tension and moisture so curls stay happy.
9) Two-Strand Twists (Half-Head) — Time: ~8 minutes
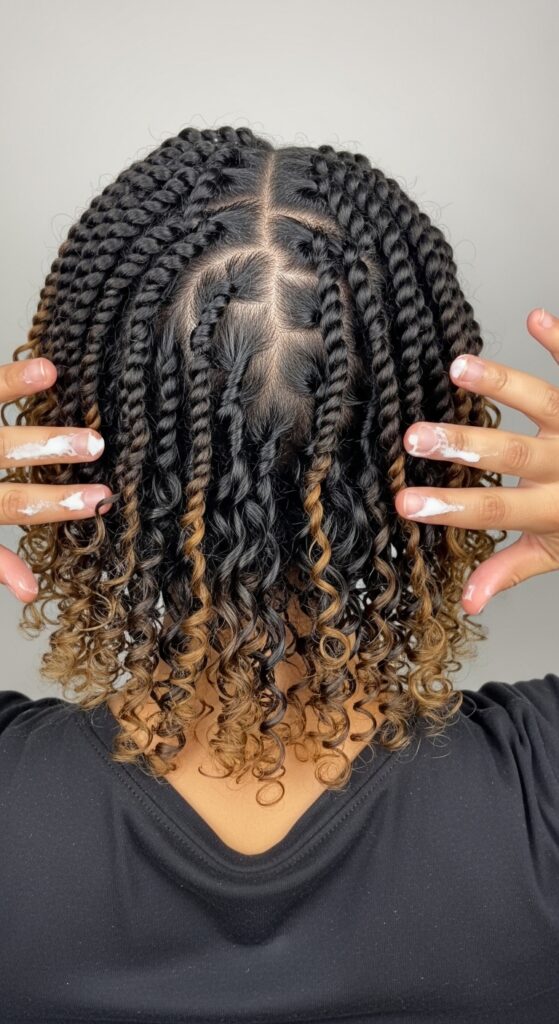
- Apply leave-in + curl cream; part in clean rows.
- Twist two strands away from the face; clip ends if needed.
- Leave the back loose or twist it into a low puff.
10) Crown Flat Twists — Time: ~10 minutes
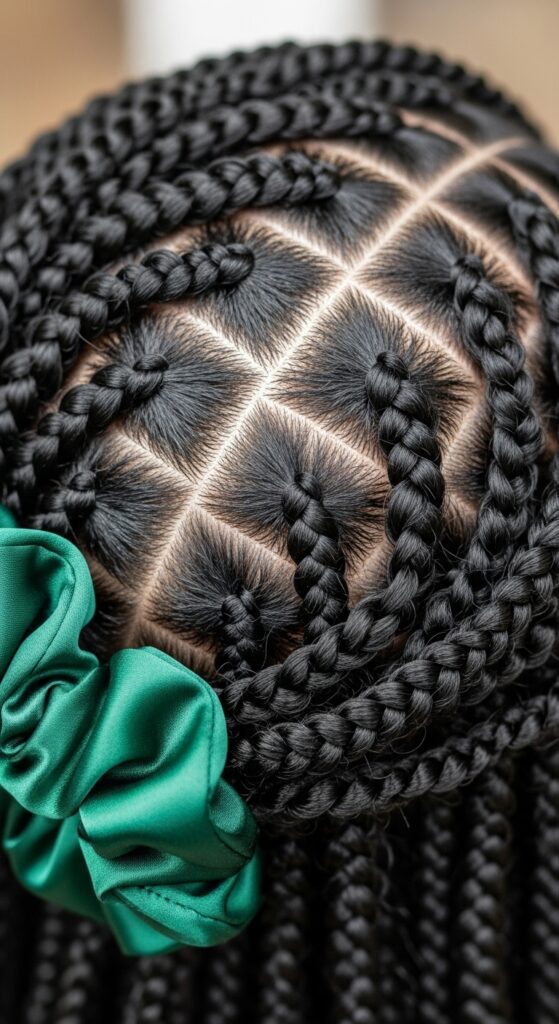
- Create a circular part around the head.
- Flat-twist along the part, feeding hair in as you go.
- Pin ends discreetly; add a satin scrunchie for softness.
11) Quick Feed-In Cornrows (3–4 rows) — Time: ~12 minutes (weekend prep)
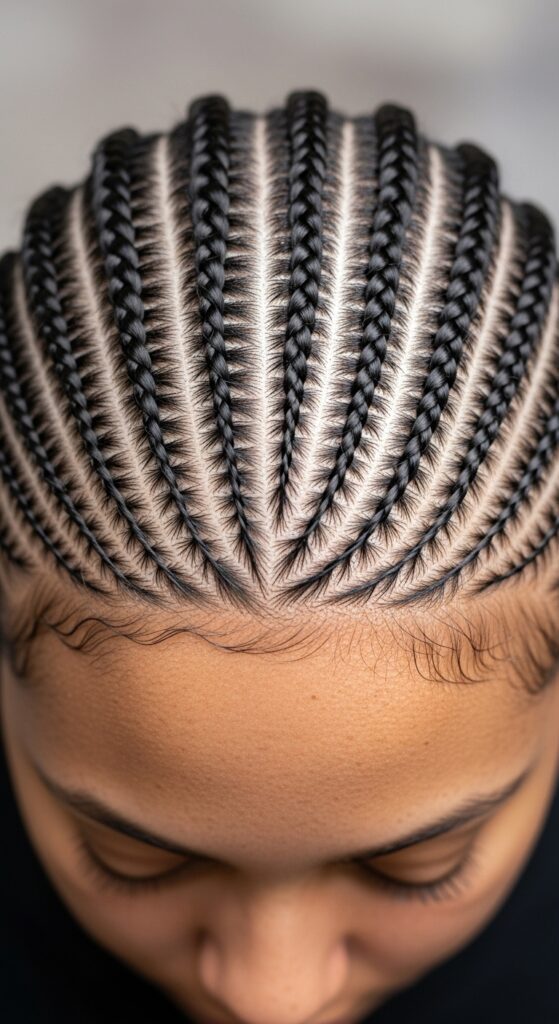
- Section front-to-back; lightly gel each row.
- Feed small strands as you go for neat, low-tension rows.
- Add beads only if school rules allow.
Care tips to stretch wear:
- Sleep in a satin bonnet or on a satin pillowcase.
- Refresh edges with water + leave-in; avoid over-gelling.
- Oil the scalp lightly every other night.
Short hair? No problem
You don’t need long hair to rock braids. You just need good placement.
12) Micro Accent Braids — Time: ~4 minutes
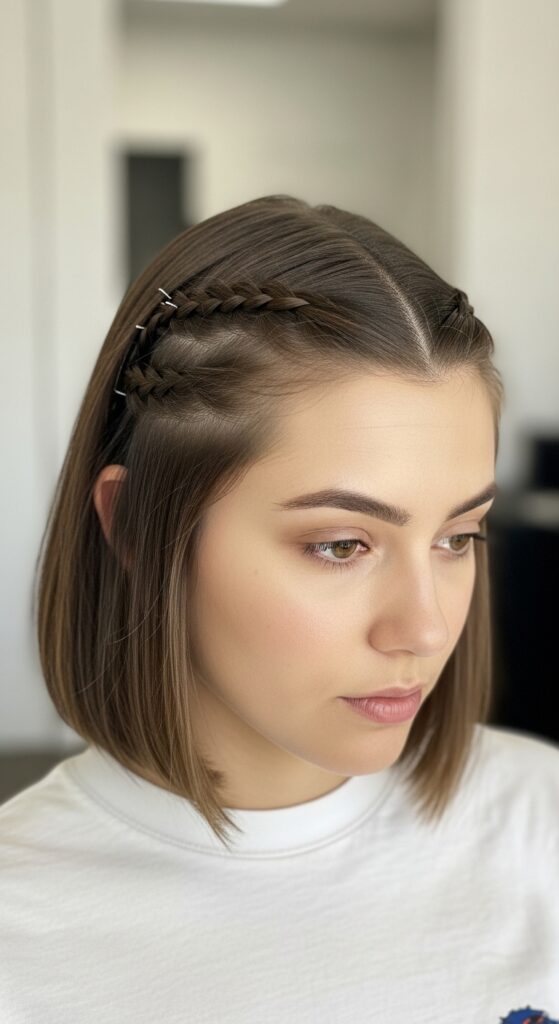
- Braid two tiny strands near the part; pin backward.
- Works on bobs and lobs; adds instant detail.
13) Half-Up Braided Claw-Clip — Time: ~5 minutes
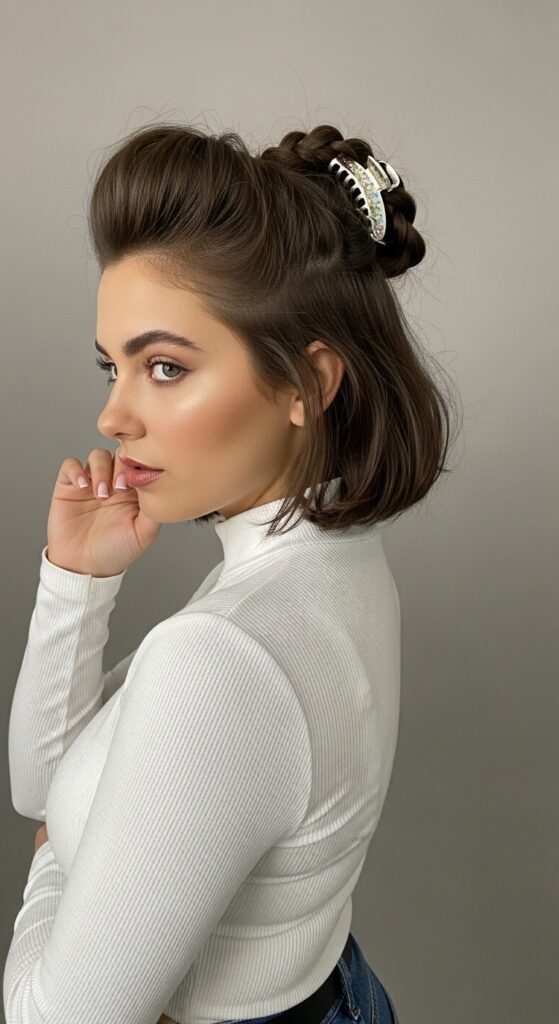
- Braid a small top section; flip into a mini claw clip.
- Creates volume and grip even on fine, short hair.
Key idea: Scale the braid to the haircut. Smaller head, shorter hair, thinner sections.
Face-shape and parting cheat codes
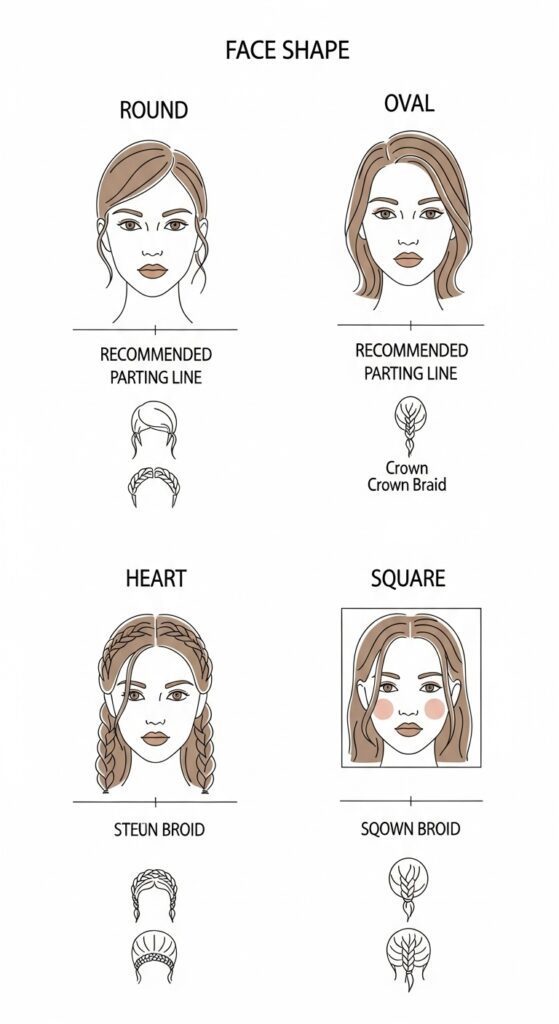
Ever wondered why a center part looks amazing on your friend but “meh” on you? The part frames the face like glasses do.
- Round face: Off-center or side parts lengthen. Try a deep side headband braid.
- Oval face: Lucky you. Center or soft side parts both flatter.
- Heart face: Balance the forehead with soft side parts and face-framing pieces.
- Square face: Side parts with curved braid paths soften angles.
Fast rule: If you feel “boxed in,” shift the part one comb tooth. You’ll feel the difference.
Accessories that pass most school rules
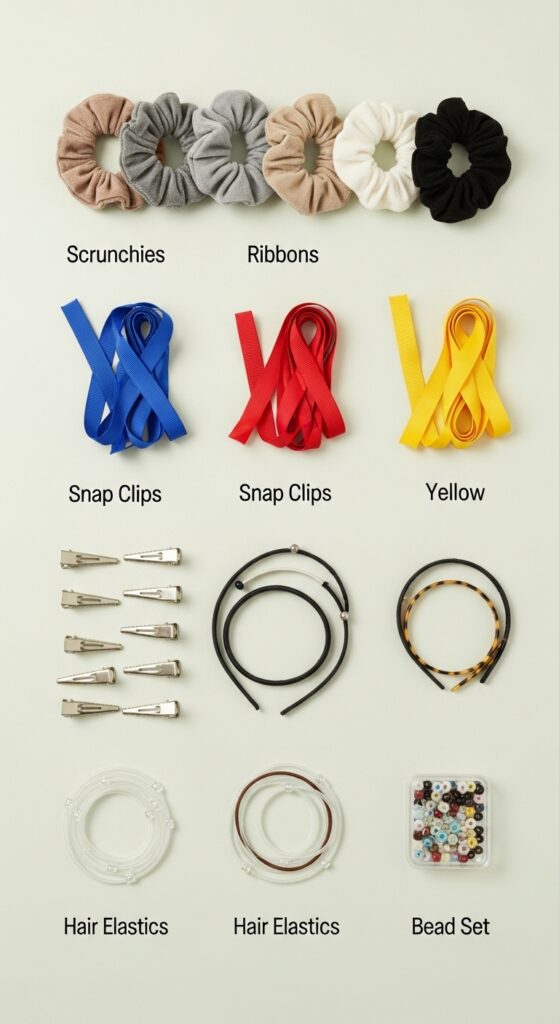
Schools vary, so read the dress code once and avoid morning debates. That said, these usually pass:
- Neutral scrunchies and thin ribbons (team colors often okay).
- Micro elastics that match hair color.
- Flat snap clips and subtle headbands.
- Small beads on braids (check policy).
- Satin scrunchie for buns to reduce breakage.
Remember: Keep metal pieces flat so backpacks don’t snag.
Real-life morning playbook (tested and calm)
You don’t need a new style daily. You need a rotation that saves time and still feels fresh. When the alarm snoozes itself (relatable), this plan rescues you.
My 3-day rotation:
- Mon: Dutch Pigtails Lite → holds through PE.
- Tue: Bubble Braid Pony → fast and fun.
- Wed: Headband Braid → keeps bangs off the face.
- Thu: Rope Braid Half-Up → cute for club photos.
- Fri: Fishtail Side Braid → picture-worthy but still quick.
Weekend prep to win weekdays:
- Trim flyaways; dust ends if needed.
- Wash + deep-condition; detangle properly.
- Refill the braid tray; toss stretched elastics.
- Pre-thread a ribbon through two elastics for speed on Monday.
Product picks: budget vs. pro (honest takes)
I keep it simple. You don’t need a 12-product lineup. You need grip, moisture, and hold—in that order. keep one product per job and you’ll move faster.
Budget faves that work:
- Detangling spray: Lightweight, silicone-free for daily use.
- Cream/gel hybrid: Tames frizz without crunch for braids.
- Dry shampoo: Helps second-day volume for bubble braids.
- Edge brush: Precise clean-up that makes everything look pro.
When to go pro:
- Coily or very thick hair: A salon-grade cream gives better slip and longer wear.
- Sensitive scalps: Fragrance-free options feel kinder during repeat braiding.
- Color-treated hair: A bond-care leave-in keeps ends from fuzzing out.
Non-negotiables for hold:
- Apply product before braiding, not after.
- Work with tension but no pain. If it hurts, loosen immediately.
- Seal the ends with a dab of cream to prevent splaying.
Quick troubleshooting (because kids move… a lot)
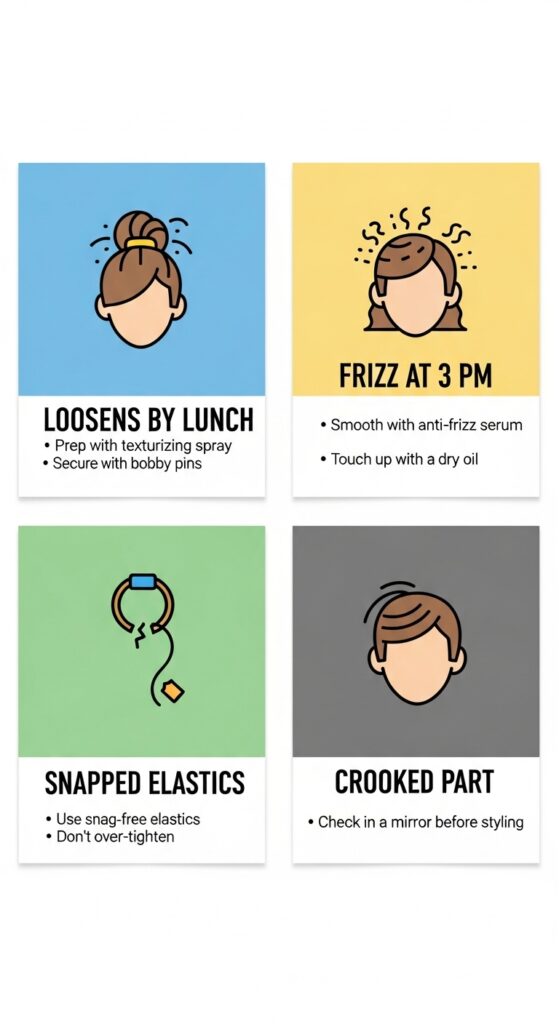
- Braids loosen by lunchtime? Start with a tighter first inch near the hairline; finish with a micro elastic and wrap a tiny strand around it for grip.
- Frizz city by 3 p.m.? Smooth a micro-amount of cream over palms and lightly “pet” the braid.
- Elastics snap? Double up at the base, single on the ends. Keep fresh elastics in the pencil pouch.
- Part looks crooked? Re-part with the rat-tail after you detangle; then clip one side immediately.
Hair type notes (so the style actually lasts)
- Fine/straight: Add texture spray first. Go for rope twists, headband braids, and bubble braids.
- Wavy: Embrace the bend. Dutch-braid pony and fishtail look fuller on you.
- Curly/Coily: Prioritize moisture and low tension. Flat twists, cornrow paths, and two-strand twists protect and pop.
Rule of thumb: The tighter the curl, the bigger the section to avoid frizz and tugging.
Mini tutorials you can memorize
When you feel rushed, muscle memory matters. These patterns live rent-free in my head.
Dutch braid (inside-out):
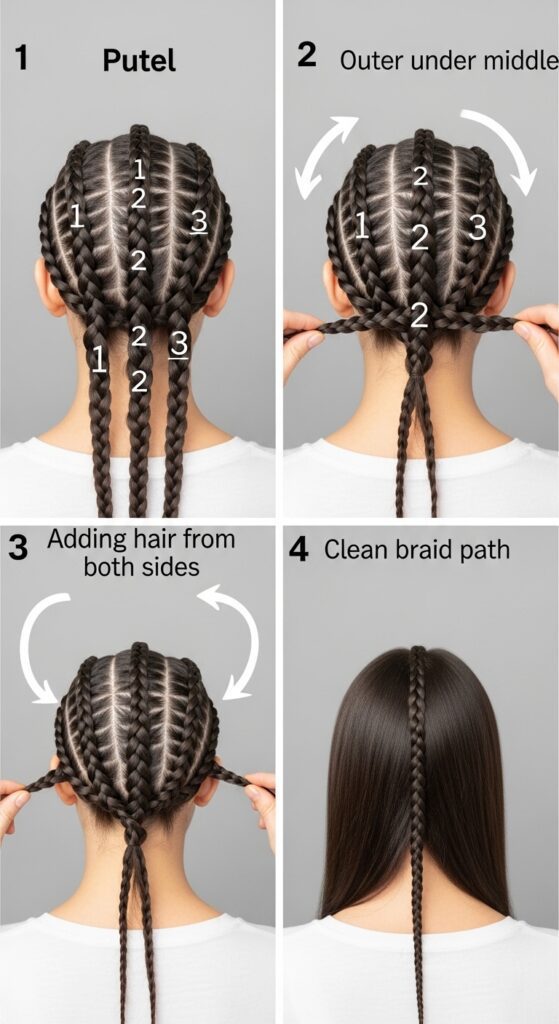
- Take three strands.
- Cross outer under middle; add small hair each time from both sides.
- Keep hands close to the head for neat tension.
Rope twist:
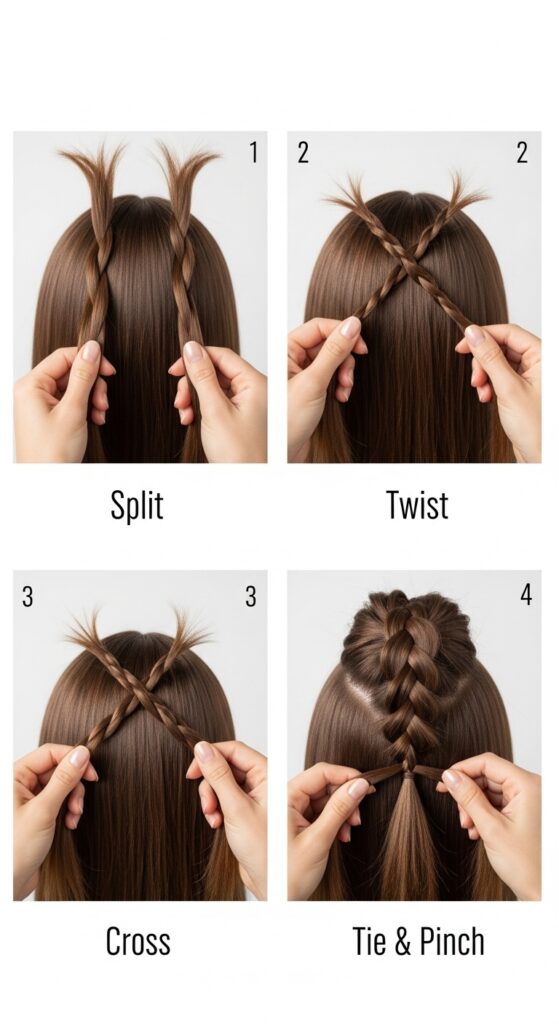
- Split into two; twist both strands in the same direction.
- Cross them in the opposite direction.
- Tie off; pinch for volume.
Fishtail:
- Split into two sections.
- Take a small piece from the outer edge of one side and cross it to the other.
- Repeat; keep pieces tiny for detail.
Bubble braid:
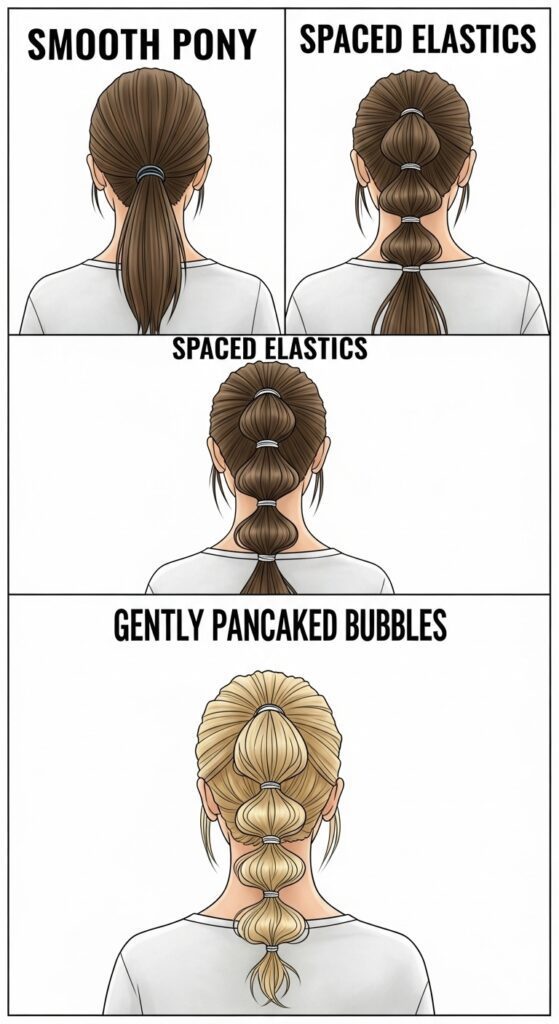
- Pony first.
- Space elastics every few inches.
- Pancake each bubble gently.
Fast style map by schedule
- Early start + PE: Boxer Braids or Dutch-Braid Pony.
- Picture day: Fishtail Side Braid or Headband Braid.
- Two-day wear: Flat twists into a low bun on day two.
- Crazy humidity: Rope Braid Half-Up with light gel.
Need a rule? If you can’t decide, default to Bubble Braid Pony. It never complains.
FAQs (the quick stuff you actually need)
How tight should I braid?
Snug near the hairline, comfortable everywhere else. No headaches allowed.
Can I sleep in braids?
Yes, when they feel comfy and you wear a satin bonnet. Refresh the hairline in the morning.
Do braids cause breakage?
Not when you avoid harsh elastics, keep tension gentle, and moisturize ends.
What if I only have 2 minutes?
Do a half-up rope twist or single bubble braid and call it done.
The final word (and a calm morning)
You don’t need a flawless salon braid at 7:15 a.m. You need reliable patterns, clean parting, and one small win before homeroom. Pick two styles from the 5-minute menu and rotate them this week. Keep your braid tray stocked, set your part before you braid, and trust your hands. School mornings feel lighter when your hair plan stays simple and you know it will hold. Ready to try the Bubble Braid Pony tomorrow and the Headband Braid on Wednesday? Your future self will thank you.


